

Fixing Face Shadows In Noon Portraits
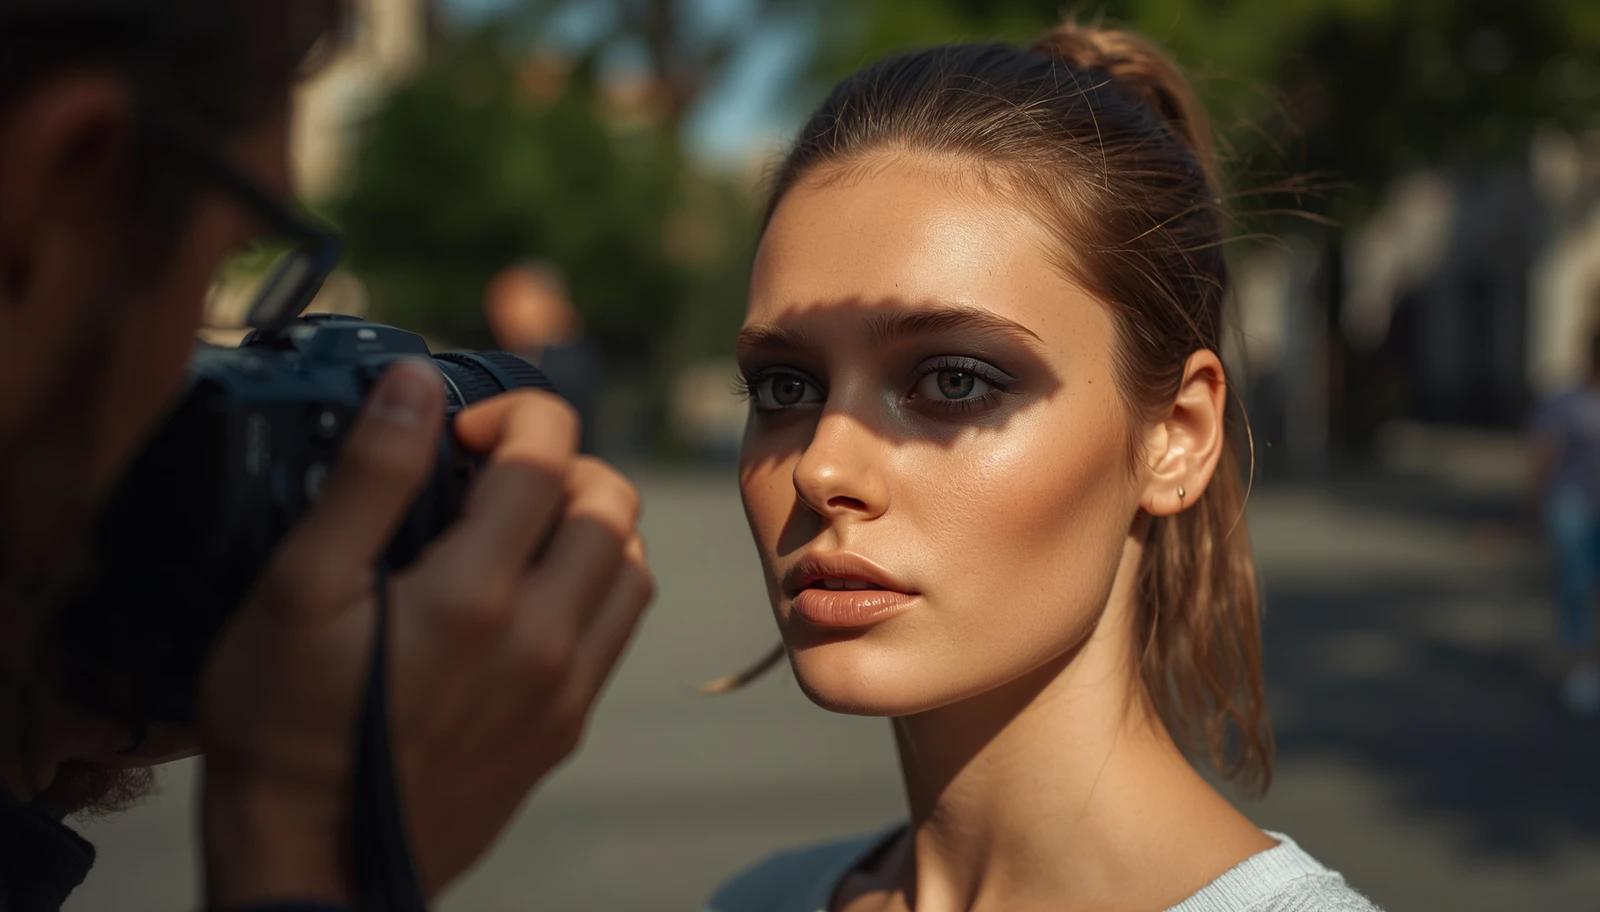
Noon photography can look deceptively simple. The sky may be clear, the scene may be bright, and the camera may appear ready, yet a portrait taken under overhead sunlight can quickly develop harsh shadows beneath the eyes, nose, cheekbones, and chin. Instead of fighting the entire scene in post-processing when fixing face shadows, photographers can often create a cleaner result by understanding how sunlight interacts with the face before taking the photograph.
Face Shadows Noon are primarily caused by the high position of the sun and the intense contrast between illuminated and shaded facial areas. The solution does not always require sophisticated equipment because small changes in position, shade, and light direction can significantly reshape the portrait. If you examine the subject’s face before pressing the shutter, you can often discover a better lighting solution within the same location.
Managing Noon Face Shadows
Managing harsh facial shadows starts with observation. Before changing camera settings, look carefully at where the strongest highlights and darkest areas appear, because their pattern reveals exactly how the sunlight is affecting the subject.
Identifying Hard Sunlight
Hard sunlight creates sharp transitions between bright and dark areas. At noon, the overhead position of the sun can produce especially noticeable shadows around the eyes and under the nose. Photographer Lindsay Adler has demonstrated that harsh sunlight can still be used effectively when its direction and intensity are deliberately controlled.
Uneven Facial Exposure
Uneven exposure becomes noticeable when one side of the face receives substantially more light than the other. Rather than immediately increasing exposure, try turning the subject slightly toward the available ambient light. This can create a more gradual tonal transition while protecting brighter areas from becoming excessively exposed.
Distracting Shadow Areas
Look beyond the face itself. Hats, hair, tree branches, railings, and architectural elements can introduce additional shadow patterns that distract from the subject. A quick preview from the shooting position can help identify these problems before they become part of the final composition.
Adjusting Outdoor Portrait Lighting
Once the shadow pattern is understood, the next step is changing the quality or direction of the available illumination. This is where Portrait Light Balancing becomes useful because the goal is not to eliminate every shadow, but to make the relationship between light and shadow look intentional. Moving the subject only a short distance can sometimes produce a greater improvement than changing multiple camera settings. Think about where the softest available light is coming from, then position the subject so that source naturally supports the face.
Moving Toward Softer Light
Open shade is one of the most practical solutions for difficult midday conditions. A building, covered area, or large tree can block direct sunlight while allowing softer ambient illumination to reach the subject. The result is usually a gentler transition across the facial features.
Using Nearby Shade
Not all shade produces the same result. Deep shade can make the face appear dull, while bright open shade can provide a useful balance between softness and brightness. Positioning the subject near the edge of a shaded area can therefore create a more dimensional portrait without exposing the face to direct overhead sunlight.
Balancing Face Light
A reflector or pale nearby surface can redirect available light toward darker areas of the face. Even a bright wall can function as a broad reflective source when positioned appropriately. This technique helps reduce excessive contrast while keeping the lighting natural and unobtrusive.
Improving Portrait Detail
Once the light becomes more balanced, attention can shift toward preserving detail. A successful outdoor portrait should retain important facial information without making the image appear artificially flattened.
Creating Even Facial Tones
Even facial tones do not mean making every section of the face equally bright. Some shadow is useful because it gives the face shape and depth. The objective is to create a smooth transition between illuminated and shaded areas so the portrait remains dimensional.
Preserving Facial Features
Protecting highlight detail is particularly important in strong sunlight. If bright areas become completely overexposed, recovering natural texture can be difficult, while moderate shadow information is often easier to refine during editing. Photographer and educator Bryan Peterson has repeatedly emphasized understanding exposure as a foundation for controlling photographic results.
Cleaner Outdoor Portraits
A technically balanced face can still be weakened by a distracting environment. Check bright objects, strong background contrasts, and unwanted shadow patterns before taking the final frame. A cleaner background allows facial expression and body language to remain the dominant visual elements.
Get Better Outdoor Portraits At Noon
Better noon portraits come from treating the environment as part of the lighting setup. Instead of assuming that direct sunlight must be accepted exactly as it appears, examine nearby shade, reflective surfaces, background brightness, and the direction of ambient light. These details can transform an ordinary outdoor location into a surprisingly flexible portrait space.
The key is to make one adjustment at a time and observe its effect. Move the subject, check the face, alter the angle, and then evaluate the highlights again. This measured approach gives you greater control without making the shooting process unnecessarily complicated. If harsh midday light is affecting your portraits, start by changing the light before changing everything else. A small shift toward open shade or reflected light can make the face cleaner, the expression clearer, and the final portrait more natural.